In 2012, Google released its own system for managing tags –Google Tag Manager. This system quickly became popular and it’s one of the most used in the world now. Currently Google Tag Manager is used to facilitate and optimize operations, both in large and in small organizations. The primary audience, that uses this resource, is marketers and webmasters. It provides great flexibility for marketers and allows webmasters to focus on more important tasks without wasting their attention to insignificant things.
What Is A Tag?
A tag is a kind of code JavaScript the function of which is to assemble and send data from web-sites and Internet applications to a third source, to Google, for example. Typically, tags are activated when you open a particular page or at the moment of some action on it. When no additional tools are used, tags are added to the source code of the application or web-site manually. However, if you're using Google Tag Manager, everything will be much easier: changing the source code is not required, but it will be enough just to specify the interface, which tags need to be used and when it’s time to activate them.

Manager Tags Google Allows You To Perform The Following Operations:
• Combining all tags of one category (for example, Google Analytics, AdWords, Floodlight, as well as tags from outside sources that were designed to optimize and monitor the advertising information), which are available at a particular web-site in the whole piece of code, and then controlling it using the web-interface. This feature eliminates the need of using the services of a webmaster editing the code by yourself. It would also significantly reduce the time for managing tags and reduce the number of permissible errors.
• Updating the configuration values as well as flags in mobile applications without any problems. Now users do not have to deal with rework and re-sending binary data, because to enable this feature of application that are associated with flags, and to change the configuration (for example, ad position, timeout, or the dynamics of the game), you can directly through interface.
Why Do We Need Google Tag Manager
The tag control system makes it possible to replace a tag for testing, analytics and marketing, which are contained in the code of the site to the new dynamic analogues, which are much more convenient in creating and updating. The user adds only a single tag to accessed Web page, which is called container. This small piece of code, which will dynamically adapt all tags, later adjusted using a web interface.
With Google Tag Manager you can monitor the tags even more than for one website. For one account in Google, you can create an unlimited number of accounts in Tag Manager, but most organizations (even the large ones) use only one, as far it’s enough.
The basic concepts that you need to know, starting the work with the Google Tag dispatcher, are tags, tigger, variables and data rate.
Tigger is a condition that may be true or false at the time when the code is running. A comparison value of a variable so that was previously set in by the user in tigger is used to determine this index.
Data rate, in its turn, is an object that contains the variables or events, which should be transferred to the web site.
For example, on the home page of the website there is an article which has a link that says “read more” at the end of each passage. The user has the opportunity to create an event-level data, which will be activated when clicking on this link. Then, using Google Tag Manager, you can create a tag or tigger for automatic transferring of information about the event to Google Analytics. If there were no this technology, the user would be forced to write his own JavaScript, which would deal with collecting the data and adding it to the web-site.
How To Set Up A Tag On The Site?
In order to successfully start using the service Google Tag Manager, you need to make a set operations for the correct setting of the tag:
• go to the page in the browser Google Tag Manager (link: tagmanager.google.com) and enter on your own account (if you have no, then you need to create a new one)
• create a special container designed for web pages
• add the desired fragment of the container on its web page
• clean the source code of all similar tags (this may be AdWords, DoubleClick and many others)
Very often, beginners have question whether the simultaneous movement of all the tags is required. The answer is yes. Simultaneous transportation all the necessary tags in the container will be the most rational solution in terms of efficiency. However, if you need more time to transport multiple tags, implementation of Google Tag Manager could be held simultaneously with this.
Installation Of Google Tag Manager
Beginning Of The Installation
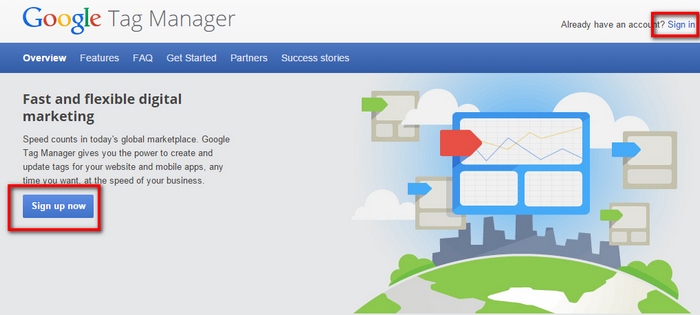
To begin the installation, you must go to the project web-page, which address: https://www.google.com/tagmanager/. Users who already have an account in the system of Google, can immediately enter it by clicking the link “Log in to your account”. It is located at the top right. If you do not have an account, you need to register. The procedure is not complicated and does not take much time.

As you enter the Google Tag Manager, you will be offered to create a new account. There are clues on almost all pages. Try to pay attention to them and to focus on the information: you can quickly find out more details about this tool.
Create An Account
The whole process of creating an account in Google Tag Manager can be divided into two stages. Firstly, you need to enter the name. It is better to be responsible on this stage, because later you will need to remember the name of that account because you will have a lot of them. In the second phase it is necessary to give the name of the container, select the method of usage, determine the domains in which you plan to use the container. You also need to configure your time zone.

Once all fields are filled in, you will need to complete the account creation, and container (button "Create account and container"). After that you need to familiarize yourself with the agreement on using the service. It is recommended to read the conditions carefully, and then decide whether you want to accept them or not.
Placing The Code
If you answer yes for the question of compliance with the conditions, then you will get the generated code. It must be placed on every page of your web-site after the tag <body>, which is an opening. For users who previously worked with the creation and development of web-sites, it will not be difficult. If you haven’t work with the development, it is best to ask a specialist for a help, he will do everything in just a few minutes. It is important to know that when you make changes in the source code, pages of the web-site may no longer function properly.

The code must always be copied and saved. Then you can safely press the “Add tags later” button.

Setting Up The Tools
You have completed the creation of an account manager and installed Google Tag Manager on your web-site. Now, it is useful to examine the particular configuration tool. It’s better to begin with adding the code Google Analytics to your web-site. In particular, it will be the code of Universal Analytics.
In the future you will definitely need a tracking ID. It means that if you have not used Google Analytics previously, you need to get an account on it.
If everything was done as described earlier, then after clicking the “Add a tag later” button, you will see this page on your screen:
Creating A Tag
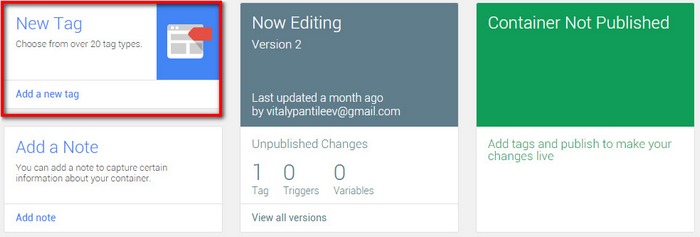
Now it is time to create our first tag. To do this, you need to click on one of the following buttons:

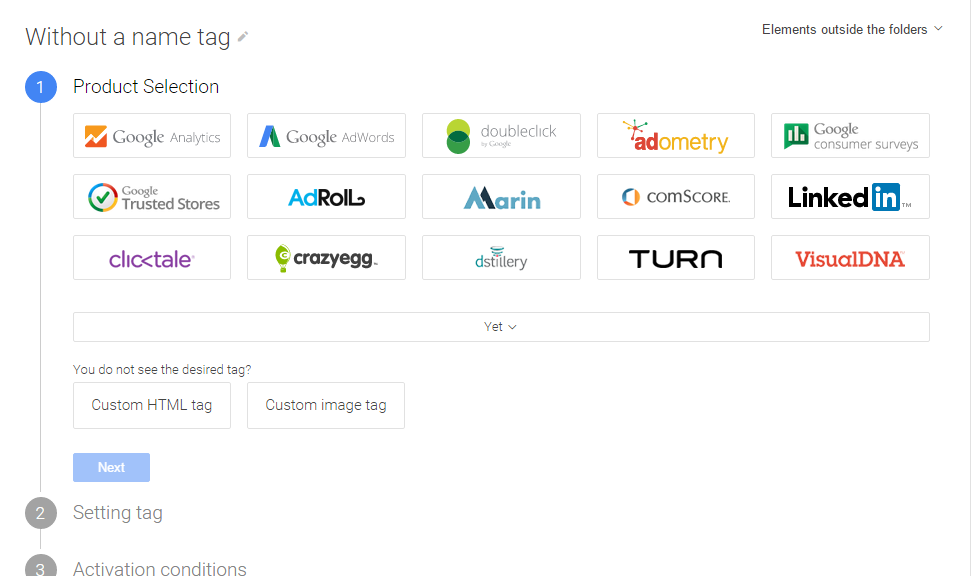
Here you will see a form, designed to create new tags. You have to be careful while filling in the form: the names for tags and rules should be chosen intelligently. Later due to that it will be easier to use the tool.
Firstly, indicate the name of the tag. When you add a standard tracking code, as in this case, you can name it the tracking code Google Analytics. After that you need to choose the appropriate tag type. Earlier we already decided that for installation we take code Universal Analytics. All you need now is to find it in the list and select:

Specify the identifier that will be used for tracking.
At the bottom you will see some additional boxes. Then determine tracking ID and indicate it. Next to the form of the creation of the tag (right) will be a special tip. You can read detailed information about where you can find a specific identifier. The algorithm of transition should look like this:

To find the identifier, you will need to copy it and place in the box titled “Tracking ID”. In the box labeled "Type of tracking" no need to make any adjustments (left it “Page View”).

Adding The Rules
To set the tag in Google Tag Manager, you need to add a rule that would carry out the activation of the tag. First of all, you need to click the “Add Rule of activation of the tag”. As far the tracking code is executed on all pages, select the relevant rule (“All pages”). To save the settings, click “Save” button:

If all of the above procedures you performed correctly, you will see the following:

Saving Tag Settings
To successfully save all tag settings do not forget to press “Save” button, which is located at the bottom of the page. After this stage the setting of the tag can rightly be considered as successfully completed. Now you need to create and publish a version of tag. To do this, press the "Create a version of":

Tag Publication
After this you have to press “Publish”:

This method allows a user to add Google Analytics tracking code to the site, without making changes in the source code of the pages. The only exception is posting code Google Tag Manager. After this, you need to wait for some time, while the data will be visible in reports. You can directly go to the reports that are generated in real-time for tracking actions of your visitors.
Tracking Conversions Using Google Tag Manager
As mentioned above, it is necessary to monitor the conversion for a successful analysis of the efficiency of web-page with promotional content, and accordingly, to increase the profit of the organization. In some cases, conversion tracking does not cause any difficulties, but most people are still faced with certain problems during the development of this process.

If the user, ho paid for his order, also received a special page with gratefulness, if he did visit, this action can be seen as a conversion. Using Analytics system, the user can set a goal for visiting a particular page or put it in the code with a special tag that will track conversions from AdWords.
How to be in the case of absence of the mentioned "thank you page"?
Currently there is a range of ways to keep track of events that the user has made on a particular site. These include:
- install tracking of events, using codes of revisions for site at which a web- page will transmit the necessary data to Google Analytics
- use Google Tag Manager. You will not face necessity for manual editing the code on a web-page while using Google Tag Manager. It can be simply adjust to a functioning site code and receive any necessary information. Google Tag Manager is used to add remarketing tags to various websites, tracking tags and conversions often enough.
Here is a brief instruction how to implement the setting of tracking for sending the form which does not provide generating of "thank you page". In other words, how to check the submitting of the form, using Google Tag Manager.
In order to carry out this operation correctly, the user will need to do the following:
• create the first tag Analytics, which, in theory, in any case, must be on a web page. It is necessary to place Analytics tag using Google Tag Manager, rather than inserting it directly into the code of the site
• create a second tag to monitor the submission of the form. Its function is fixation of sending all the forms that are currently available on the web-page. During its configuration, it is better to test verification of correct filling. If the checking does not function properly, it is best not to connect it while setting up a tag
• create the first rule, which will determine submission form that user needs. To keep track of form submission, you must select the identifier that will be determined by the desired shape (in our case, it will be element id). After that we create the conditions for the event = gtm.formSubmit

• create the third tag that will join an active phase of the first rule of sending information about the occurred event to Analytics system. User should note variation of tracking - "Event". The graph of parameters of monitored events should be added to the information on the names and categories of activities which will be send to Analytics
• create a special purpose named "Call", which will deal with tracking events in Analytics for further data reception from the third tag
• make import of your necessary goals from Analytics to AdWords. Generally, the information appears in AdWords with little delay of thirty to fifty hours. If you need to monitor operational information, the best thing is to use Analytics system.
Remarketing Through Google Tag Manager
Remarketing is one of the technologies that are related to behavioral marketing, the main task of which is to encourage users, who visit a particular site, to perform the necessary actions.
On web-sites, it works as:
• there is a code for tracking all visitors of particular website
• a visitor comes to your Internet source
• the user is placed in a specially provided remarketing list, depending on his actions on the web-site
• user is shown that advertising which is designed for all users of a specific remarketing list
As a rule, remarketing is used for achieving such goals:
• conversion. The idea of this process is to increase the number of conversions by displaying the advertisement with more profitable and presentable condition. Also, the goal may be to motivate of visitors, who had gone from bag, to complete the conversion process or the demonstration of ad sales, promotions to other people who were previously in similar events or discounted products
• the sale of related products. Generally, any major purchase also requires a certain amount of smaller products for further service
• branding. Remarketing on the list of the most powerful tools with which the process of branding is done. Brand advertising can be demonstrated to a concrete circle of the users who are interested in themes of your product. You can use all available tools of context-media web. But here it is important not to show your advertisement too often, so you don’t annoy the visitor
• segmentation. This function provides a wide range of actions, such as the separation of those who have purchased and those who didn’t buy your goods, the part of audiences who are interested in specific types of goods, with the exception of the members, who have already bought goods. Often, the visitor can’t decide immediately to buy something or no. If you make the remarketing to context-media web, you will get the opportunity to receive conversion from such users at a lower price

As you can see on the illustration, the price of conversion that was made for second is almost five times lower
Setting The Lists
Remarketing lists can be set up not only in the Google AdWords, but also in Google Analytics (the effectiveness does not change)
Setting Google Analytics
Resource Google Analytics allows the user to sort the remarketing lists only for the purpose of advertising in the context-media web. For setting, we need to link Google Analytics and Google AdWords. At the same time, you should sign in the same account, or resources should have all the necessary rights. If the accounts can’t be connected, it means you can’t set remarketing lists in the moment.

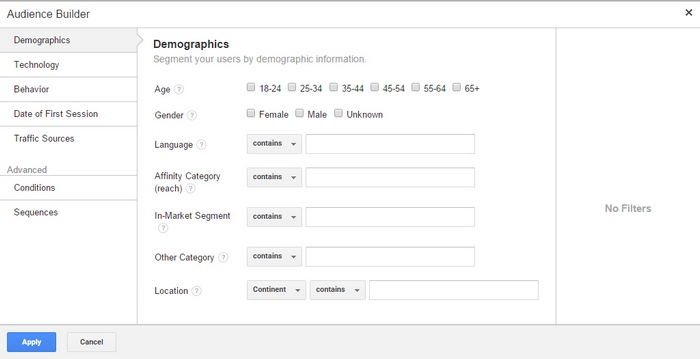
Then, you must set up the audience. Before this, you need to be sure that you read restrictions about collecting sensitive information, in order to avoid any unpleasant situations in the future.

Remember that a list should be attached to only one AdWords account.
Setting Google AdWords
Internet resource Google AdWords allows a user to create lists for remarketing on the search and the context-media web. This process is performed by adding remarketing tag to a web-page. This tag can be easily created using the item "Common Library" on the menu in the tab “audience”.

Please be aware that for a successful starting of displaying of remarketing lists, you need to collect and sort at least hundred IDs for advertising banners in the context-media web and at least a thousand for remarketing during the search.
Where Do We Use Remarketing On Search Advertising?
Remarketing on search advertising is mainly used by companies for the search network, using the tab “Audiences”. Exactly in this tab you need to add lists, members of which an advertisement must be shown.

For successful demonstration of advertising to users of certain remarketing list, you need the option that is called “targeting and bidding”, otherwise, advertising information will be shown not only to the members of certain remarketing list, but among all other visitors to the web-page.
As a rule, remarketing on the context-media web is used by companies to display network by using the tab “Display Network”. Next, you need to click the “+Targeting” and to include or exclude desired remarketing user list.

Also it is important to note that during the creation of a new group of ads, a user may choose a method of targeting as “the interests and remarketing”
Try not to forget to set restrictions on how often your ad will be shown to users in order to avoid annoyance and reverse effect.

If you set remarketing lists correctly you will also get the lists of people who have not visited your web page, because google can provide free lists of those audiences that are similar to those which were collected by you earlier. The system collects these lists of similar audience in the last thirty days.
Google Tag Manager In Mobile Applications
If you are using Google Tag Manager actively, then without any problems you can manage the configuration settings that you would like to change in the near future, or they may be changed under certain circumstances. To do this, you only need to set parameters instead of the constant dynamic. After that you will have the ability to manage changes in the rules of the specific values using Google Tag Manager. If you've done everything correctly, now you can change:
• the length, width and location of the ads. This is very useful if, for example, you need to adjust the height or width to the size of the banner for display of certain device
• any available options of gaming applications on your mobile device
• the settings of the user interface (to fit them into the properties of a particular mobile platform)
• language settings in the applications. Also very important, especially when imported equipment is used
How It Works
The container, which is used by Google Tag Manager during the operation, contains tigger and variables (previously they were known as macros and rules) that are engaged in the definition of the configuration settings, as well as the values of the flags in your application. User of Google Tag Manager can easily manage this container directly in his account: to make changes in the structure of the variables or tigger, publish, monitor and test new versions of container. While developing a mobile app by yourself, you associate the container with it directly by using SDK of Google Tag Manager. Also, you mark a container of application, that was set by default, hold certain configuration values that were used before the first loading of the container. Once mentioned application will have access to the Internet and will download the required container, the container that is used by default, is not used anymore. Application regularly checks for new versions of the container (about twice a day if connection to the Internet is uninterrupted).
Algorithm Of Creation Of A Container For Mobile Applications
• go to Google Tag Manager homepage, link - tagmanager.google.com and create your account (go to the current one, if it was created by you earlier)
• create a special container for the application, choose from the “mobile applications”
• download and install the SDK of Google Tag Manager for mobile gadgets
At first sight, it may seem that using Google Tag Manager is quite difficult. However, when you learn how to work with it, you will realize that it is very easy to use while working with the web- site. Google Tag Manager gives the possibility to make interface operations , that previously you made through source code of the page, via the Web. This helps you to deal with everything by yourself.
So, it can be concluded that Google Tag Manager is a very useful and a multifunctional resource that can significantly save time to lots of workers and improve the quality of their work and productivity. Automation of certain aspects will prevent a large number of possible bugs related to human factor. In addition, Google Tag Manager is not chargeable service and it is available to any user who has Google account, which increases its popularity and gives a hope that all functions and features will be extended in next versions.


